



The Art of the Slow Commute: Why Modern Rail is a Photographer’s Dream
One mode of travel I recently tried after leaving the military was rail transportation. I have flown on all manner of aircraft; I have driven or ridden in all types of trucks, cars, and combat vehicles. But I had only limited experience on trains. Of course, I have used the subway in major cities like Seoul, Chicago, and Atlanta. Of course, I was even a member of Operation Life Saver when I was in high school, which spreads awareness of train safety. Trains were never a glorious means of travel or a childhood wish, but I still wanted to give it a chance. You might be thinking about all the issues with train travel. Cramped conditions, no food, or long travel times. However, my hope is that this article opens your mind to the possibilities of train travel, especially as a photographer. You might be surprised at the benefits. We will discuss the logistics of a train trip (I went on the California Zephyr route) with an elevated aesthetic; we create an understanding that justifies the "slow" commute as a strategic choice for high-end art. There is a distinct discipline to the "slow" commute that a 35,000-foot flight simply cannot replicate. As a photographer, speed is often the enemy of observation. When we rush, we miss the subtle shifts in light across the Nebraska plains or the way the Colorado River carves through Glenwood Canyon. Taking pictures from a train will give you far more opportunities for beautiful landscapes and also, if you have a model to work with, an unrushed photoshoot that planes don’t offer. Also, since you're not driving or cramped in a vehicle, you can take the scenic photos you want to take as the world passes by you. For the past few years, I attempted to trade the sterile efficiency of the airport for the rhythmic, intentional pace of the rails. I bought a ticket in a roomette car from Chicago to San Francisco on the California Zephyr. From the vast farmlands of the Midwest to crossing the Rockies west of Denver, and then passing through the rugged Sierra Nevadas. The experience was good enough for me to then purchase a ticket from a closer rail station in Illinois to Denver. I found that the train isn't just a mode of transport; it’s a moving studio.
Why Rail?
- The Safety Multiplier: According to the U.S. Bureau of Transportation Statistics, rail travel is dramatically safer than driving and operates at near-zero fatality rates comparable to commercial air travel. While passenger cars and light trucks cause tens of thousands of deaths and millions of injuries annually on U.S. highways, riding passenger rail is roughly 20 times safer per mile than driving a personal vehicle.
- Where the Real Risk Lies: Internal train safety inside the carriage is exceptionally high. Nearly all rail-related incidents in the U.S. stem from external factors. Specifically, vehicle collisions at passive grade crossings or unauthorized track trespassing. You are very unlikely to have an onboard accident. Also, I was on a train that had a medical emergency. The conductor just stopped the train, and an ambulance drove up to take the passenger to the hospital. Yes, it delayed the train for an hour, but at least we didn’t have to land, deboard a plane, or wait in an airport (I just waited in my roomette and read a book to pass the time). We also didn’t have to look for a hospital in an unfamiliar town while on a long road trip. In Europe and Asia, high-speed networks like Japan’s Shinkansen (Bullet Train) or Europe’s TGV/AVE fleets set world-class safety records. Japan's Shinkansen, for instance, has carried billions of passengers over six decades with zero passenger fatalities due to train derailments or collisions.
- No "2-Hour Early" Penalty: Unlike airlines, which require passengers to arrive 90 to 120 minutes before departure for baggage drops, security lines, and gate closures, train travel typically requires arriving just 15 to 30 minutes before departure. If you travel first class on a train, train stations normally have first class lounges for you to wait, and a conductor will take you right to the train when it is ready to board.
- Frictionless Security & Ticketing: Rail travel does not require removing shoes, unpacking laptop bags, or limiting liquids to 3.4 oz. Tickets are easily scanned directly from a smartphone wallet upon boarding or while underway. Security will check you, and there are usually measures to ensure everyone is safe, but it is no way as invasive as flying.
- City Center to City Center: Major train terminals (e.g., Union Station in Chicago, Penn Station in NYC, Gare du Nord in Paris, or Tokyo Station) drop passengers directly into the heart of metropolitan centers. Flying requires costly, lengthy transfers from suburban airports to downtown hubs, making total door-to-door transit times on routes under 500 miles often faster by train than by air.
- Baggage Freedom: Unlike airlines that charge for checked bags or enforce strict carry-on weight limits (especially low-cost carriers in Europe and Asia weighing bags at 7kg–10kg), Amtrak permits two free carry-on bags plus two free personal items, without aggressive size-check traps or gate fees.
- Generous Legroom & No Middle Seats: Even standard Coach class features legroom superior to airline domestic First Class, with deep seat recline, fold-down footrests, and guaranteed aisle or window layouts. Trains now also have dedicated work or quiet cars equipped with standard AC power outlets at every seat, tray tables, free Wi-Fi, and designated "Quiet Cars" where cell phone calls and loud noise are strictly prohibited.
- Observation & Lounge Cars: Long-distance routes (such as the Empire Builder or California Zephyr) feature floor-to-ceiling panoramic glass Observation Cars, giving travelers a rolling landscape lounge to work or relax. Many times a day, these cars are empty, so you can enjoy the scenery, or they offer a chance to meet other passengers. Also, many train employees request common etiquette so people don’t camp out in these cars, so everyone has a chance to enjoy them.
- Sleeper Accommodation Upgrades: Private Roomettes and Bedrooms increase train ticketing costs dramatically but include convertible beds, dedicated car attendants, complimentary chef-prepared meals, and station lounge access before departure. I travelled in a roomette for a 52-hour trip and coach for an 18-hour trip. Keep reading below to get my thoughts on which is better.
- Ultra-High-Speed Wi-Fi & Productivity Hubs: European routes (Eurostar, ICE, Frecciarossa) feature silent work zones, high-speed 5G cellular repeaters, and digital seat-reservation displays. Most trains feature wi-fi access, or you can operate your phone off cellular towers based on your current plan. I found that some remote places in the USA had cell outages, but my phone worked most of the way. When it didn’t, I read a book.
- Onboard Dining & Gastronomy: Rather than vending-style snacks, most trains now feature full bar cars serving espresso, regional wines, and fresh meals. Japanese Shinkansen trains offer legendary local Eki-bento (station lunch boxes) tailored to specific regional stopping points along the journey. Amtrak will normally have a dining car and a snack car for most cravings. The dining car will be on set catering hours that they will announce when it is your reserved time to go eat. Be prepared to sit with others and meet new people every meal. Also, unlike an airline, you can bring snacks in your bag, and yes, even liquids.
- Luggage & Bike Integration: European and Asian rail networks seamlessly integrate dedicated spaces for oversized luggage, sporting gear, and unassembled bicycles without hidden fees. Amtrak can also accommodate bigger luggage like camera and lighting gear in cargo cars. In my roomette car, there were extra storage shelves by the bathroom area for my large bag that I stored, so I didn’t have to take up space in my room.
Two Perspectives on the Rail: To truly understand the rails, you have to experience both the solitude of the sleeper and the community of the coach.
- The Roomette Experience (Chicago to San Francisco): Traveling in a Superliner Roomette is an exercise in efficiency and private observation. Leaving Union Station, the Roomette becomes your private gallery window. Especially when you pull out of the tunnel to see the sprawling city of Chicago. The highlight of this leg is undoubtedly the transition from the flat, rhythmic Midwestern fields into the dramatic ascent of the Rockies. Having your own space allows you to set up your gear, manage your lighting (watch out for window reflections!), and wait for that perfect, fleeting moment when the sun hits the peaks of the Continental Divide. With the room doors shut, I was able to take a lot of video without worry of noise pollution or interruptions.
- The Coach Perspective (Illinois to Denver): There is a different energy in the Coach cars. Departing from a small town in Illinois, you witness the ease of train travel when you walk right onto the train from the station. Parking was free as well; take that at airports. Coach travel on the Zephyr offers surprisingly ample legroom and large windows at a much lower cost than a roomette or sleeper cabin. The real secret is that you still have access to the snack bar and Sightseer Lounge. The big difference is that everything costs extra. You will need to accommodate other passengers; you don’t have the security and quiet of a room.
The Great Debate (Rail vs. Air): For the professional, the choice between a plane and a train isn't about time; it’s about the value of the experience.
| Feature | Train Travel | Airplane Travel |
| Creative Opportunity | Constant. The landscape evolves second by second. | Limited. 30 minutes of ascent/descent, then clouds or night or ocean. |
| Space & Gear | Massive legroom; can accommodate larger baggage requirements; no "liquid" restrictions for cleaning kits or bringing food/beverage. | Cramped; strict limits on baggage weight and size. |
| Stress Level | Low. No TSA, no middle seats, walk around freely. | High. Security lines, boarding groups, and seatbelt lights. |
| Productivity | High. Large tables, wi-fi, and steady movement for editing. | Low. Tiny tray tables and "airplane mode" restrictions. |

The Skyborne Studio: Air Travel, Sneaky Fees, and High-Altitude Framing
For the modern photographer, an airplane trip is more than just transit from one place to another. It’s a high-altitude environment for photos, a logistical gauntlet, a fast way to get to shoot locations, and a major line item on your business ledger. Flying today is not cheap, especially when airlines are now charging for every piece and parcel of your trip. Getting yourself and tens of thousands of dollars in fragile equipment from point A to point B requires tactical preparation. I have spent a lot of time in the air. Whether commercial, military, contracted, or private, I have flown thousands of hours and hundreds of thousands of miles. I even circumvented the world in a single year from Hawaii through Europe to Afghanistan and back to Hawaii through Asia. Throughout my years of travel, I have seen many ways of navigating the lines, airports, customer cares, travel agents, and security agents. I want this blog to give you all a peace of mind, a few tactics, and maybe even ways to enjoy traveling safely through the skies. For the members to www.marcusfolkphotography.com, you will get more creative tactics and business tricks at the end in the member’s area. I will discuss how to safeguard equipment, yourself, and your wallet. If you want to know more, become a member and then keep reading. Below is the definitive guide to conquering air travel, dodging airline cash grabs, and mastering creative framing at 30,000 feet.
1. Sky-High Etiquette and Avoid Getting Scammed.
Best Practices & Etiquette for All Travelers:
- Before You Arrive: Always take care in looking through the documents and emails that you get from the airlines leading up to your day of travel. If you are flying domestic, ensure you know about the place you are going. Not all laws, regulations, and customs are the same; even in the same country. For foreign travel, you should always check the laws and visa requirements, and recheck as you get closer to flying. I recently flew to Thailand where they changed their visa requirements a week before I flew. This included a digital entry requirement that could only be done less than 3 days before entry. Also, when I traveled to the Philippines, the government required a digital entry code that their website gives out for free; after you complete their form with your information. However, there are many websites that say they can file for you for $100. Don’t fall for those scams as most governments have ways to fulfill their requirements for free and they are usually not a difficult tasks.
- Avoid Scams or Price Gouging: I have found travel agencies have a major deficiency when using them to book your travel, when an airline cancels or changes your flight. Most airlines will work with you directly unless you booked through a travel agency. If you did, you will have to work with the travel agency. Check the travel agency policies for refunds and cancellations before you use their services. I recently had a travel agency not refund me the full amount, leading to a painful conflict resolution that included filing a Federal Trade Commission inquiry. The travel agency failed to reschedule my flight, made no attempt to remedy my issues, and even recommended changing my travel plans to an airport 800 miles from my home. I had to make my own plans 3 days before my trip at my own expense.
- Airline Hidden Fees: When buying tickets from an airline or a travel agency, pay attention to added charges. I cannot decide for you what you are willing to pay for, or what you might need during a flight, but be aware that airlines now charge for seats, baggage limits, meals, internet, and even checking bags can now be an extra charge. You should select what you need, but be aware that the advertised price will never be the final cost to you. Also, if you are not paying attention to what you are clicking on or buying, those fees will add up or you may purchase something you don’t need. To find the best price, I found it is best to shop around, and then go directly to the airline to see if you can get the same deals. Check different days and even different airports, if you can. Always check reviews on an airline or travel agency before purchasing through them.
- Day Before Prep: Pack your bags with time to adjust for weather, delays, problems, and possible shifting items to other bags if you are overweight. See the next section for tips on packing. Other things I do the day before are to print itineraries, codes, and phone numbers, or have them in my phone. This allows me to access that information while traveling, don’t put them in your check bag. I also check flight status and weather to ensure if I need to make any changes before leaving home. Lastly, I’ll check my plans, especially how I am getting to the airport, and let my bank know I am traveling (forgetting this has left me stranded once or twice).
- Baggage Preparations: Most airlines restrict standard checked bags to 23 kg (50 lbs) for Economy class and 32 kg (70 lbs) for Business/First class. Carry-on limits usually range from 7 to 10 kg (15 to 22 lbs). The maximum legal weight for any single checked bag, universally, is 32 kg (70 lbs) to protect baggage handlers. International Standards (IATA) the maximum checked bag size is 158 linear cm (62 linear inches). Because fees and allowances fluctuate heavily depending on your route, class, and carrier, you should always verify your exact limits and review the IATA Passenger Baggage Rules for more info. A good tip is to stand on a scale and weigh myself and then weigh myself with my bags to make sure I am in tolerance. If you go over the limit, you could pay around $100 or more in fees. Airlines are also charging to increase your bag weight when buying tickets so look out for those hidden fees as we discussed above. I recently had an airline charge $30 to fly with 20kg or $90 to fly at 32kg when I flew around Asia.
- Batteries and Liquids: I think we all know at this point that you cannot take liquids on the plane, some exceptions for babies formula can be allowed. Make sure hygiene and personal care items are in your check bag and secure in sealed bags for if they get crushed. Although I am used to packing my liquids in my check bag, I sometimes forget where to put batteries. First, you always want to carry them on the plane. Batteries under 100 Wh are permitted in carry-on bags with a limit of 15-20 personal electronic devices and up to 2 spare batteries per passenger. Make sure if you have detachable batteries in your check bag that you move them to your carry on.
- Security Line Efficiency: TSA and international airport security checkpoints can slow you down significantly if you aren't organized. Pack all large electronics, loose batteries, and heavy metal camera bodies in easily accessible compartments. Let the agents know ahead of time if you have high-capacity power banks or delicate film that requires a manual hand-check. Most airports are not making you take off your shoes anymore but I still run into places that make you take off your belt. Move in line as efficiently as possible, pay attention to security guidance, and put your items in the bins as quickly as you can. A good tip is to empty your pockets and items into your carry-on bag before you go through, then you don’t have to worry about your wallet being loose in the bin. Walk through the scanners when ordered, don’t argue with security, and pick up your items from the bin to immediately move out of the way. Don’t put your stuff on in line and don’t forget to move your emptied bin to the cart to help everyone behind you.
- The Overhead Bin Compromise: Board the plane as fast as you can, be courteous and efficient. Have your bag ready to go into the overhead bin or under your seat so you don’t block the aisle more than you need. Your bag, especially with a high-end camera in it, is your lifeline and should never be checked. However, don't be the passenger who hogs the entire overhead compartment. Place your primary hard-shell roller or tactical pack in the bin wheels-first, and put your personal item (like a small laptop bag) under the seat in front of you until after takeoff. Try to use the overhead bin on your row, but if you cannot, use one that is in view of your seat.
- Window Seat Protocol: If you plan on shooting aerial landscapes, book a window seat ahead of the wing to avoid engine heat distorting your images, or well behind it. Be courteous to your seatmates: keep your movements tight, don't block their view for hours on end, and dim your camera’s LCD screen during night flights to avoid bothering the cabin. If you plan on using your camera, and not a cellphone or smaller device, you may want to pull it out before you enter the plane and not do it while stowing your bags in the isle.
- After the Flight: Don’t be that person that pushes their way to get off first or doesn’t allow those in front of you to get off the plane in sequence. If you need to get off a plane fast, get a seat in front or tell the stewards. Every time I see someone pushing their way off the plane, they end up standing next to me at the baggage carousel waiting for our check bags. If it is because of a short connection, tell the stewards and they can help you or even call ahead to the gate to let them know you are coming. Most people understand and are considerate to those situations from my experience. Just wait your turn, grab your bags, and thank the flight crew as you leave. When at the baggage carousel, stand back so you can see the baggage belts, you don’t need to go up to the belts until you see your bag. This keeps everything clear for everyone to grab their bags without having to climb on each other. Always, check your tag to make sure it is your bag, even when the bag looks exactly like your bag, always double check. Make sure you head to the right area to leave the airport (custom declarations, security checkpoints, rental kiosks, or ground transportation) and watch out for traffic. Relax, you made it.
- Lost Baggage: Lost baggage doesn’t happen often but it can happen. When you check in to the airport to begin your trip, you should get a bar code tag for your check bag. If your bag does not come off the plane you are on through the baggage claim carousel, then look for the baggage custom service desk or your airline counter. They should be able to scan your baggage ticket bar code and find it. Work with them, don’t get angry, and ensure yourself that they very much know what you are going through. Be careful of people trying to charge you to deliver your bags or requesting money when dropping your bags off, they are paid by the airline, not you, but if you tip, that is up to you. Check with the airline if they can assist with things you might need, but don’t expect them to provide or pay for items in your baggage. It is annoying, but an unfortunate part of air travel that hopefully doesn’t happen to you, but if it does, let it be not often.
New Regulations & Sneaky Airline Charges:
Airlines are constantly rewriting the rules to squeeze extra revenue out of travelers. We talked much about these sly tactics above but I wanted to give you some more tips. Staying ahead of these changes will save you hundreds of dollars per flight, yes per flight.- The Basic Economy Gate Trap: Both domestic legacy carriers and global budget airlines are aggressively policing "Basic Economy" tickets. Many now strictly enforce a one personal item only rule. This means that you might have to purchase a higher priced seat or pay specifically for more baggage. Both will mean higher prices in your overall travel as you will have to do this each flight. If your camera backpack exceeds the strict dimensional size at the gate, you will be hit with a mandatory checked bag fee, sometimes costing up to $100 right on the jetway.
- Dynamic and Unbundled Carry-On Fees: Outside the USA, ultra-low-cost carriers (ULCCs) in Europe and Asia are now dynamically pricing overhead bin space. A carry-on bag that costs $15 when booking online can skyrocket to $65 if added at the check-in desk. Always purchase your carry-on allowance at the moment of ticket selection. I had to do this when flying around Asia and it added $90 to my costs. While US domestic flights rarely weigh carry-on luggage, international carriers frequently enforce a strict 7kg to 10kg (15-22 lbs) limit for cabin baggage. A premium camera body and two fast zooms can easily blast past this restriction, forcing an unexpected gate-check of your most fragile gear. I will reiterate this, always check each flight's baggage allowance, size, and weights.
- The Seat Selection Shakedown: Airlines are increasingly blocking off up to 70% of the cabin as "preferred seating," charging premiums just to sit next to your traveling companion or secure a window line. If you don't pay, algorithms will intentionally split itineraries across separate rows during auto-check-in. Be careful with seat selection, especially if you are not allowed to select a seat at purchase. Also, be kind if someone wants to switch seats, however always notify the stewards as seats are now also tied to extras such as meals, internet, and other packages. If someone asks and you do not want to switch, just politely let them know that you cannot. U.S. airlines are now prohibited from charging extra family-seating fees so children under 13 can sit with an accompanying adult.
- Delayed Baggage Refunds: The U.S. Department of Transportation (only applies to US Carriers or US Flights) enforces rules requiring full refunds for checked bag fees if the luggage is significantly delayed (e.g., more than 12 hours on domestic flights)
- Automatic Ticket Refunds: In the U.S., the DOT (again only applies to U.S Carriers or U.S. flights) mandates guaranteed, no-hassle cash refunds for flights that are canceled or significantly changed, as opposed to airlines automatically issuing travel vouchers. This can be up to 4 times the cost of the flight if they cancel. It is strongly recommended that you never leave the airport if your flight is cancelled without a reimbursement, new flight, or a voucher. The European Parliament approved updates to EU261 regulations. These upgrades protect free cabin hand luggage and mandate that after a cancellation or denied boarding, airlines must provide an alternative flight within three hours, even if it requires booking on a partner airline or providing alternative transportation
- Real ID Enforcement and Biometric Scans: Airports are fully enforcing REAL ID requirements for U.S. travelers. Passports are allowed if you do not have a REAL ID for now. Be aware of third party biometric companies attempting to charge you to get through security “easier.” I am not saying these companies aren’t true, but you need to research and understand any company wanting your biometric data and private information at cost. Just like my trip to the Philippines, make sure you don’t pay for something the government will do for free. Travelers flying internationally should note the rollout of new biometric and face-scan border systems. Most of these are tied to immigration so you will have to consent if you want to travel in those countries. Thailand for example, scans your face and takes your fingerprints at entry and exiting the country.
2. Advanced Photography and Aviation Operations (MEMBERS ONLY).
The following section is reserved for active Marcus Folk Photography members. Log in to access mastering aerial landscapes, financial tips, moving camera gear, and RAW-file editing presets for high-altitude haze removal.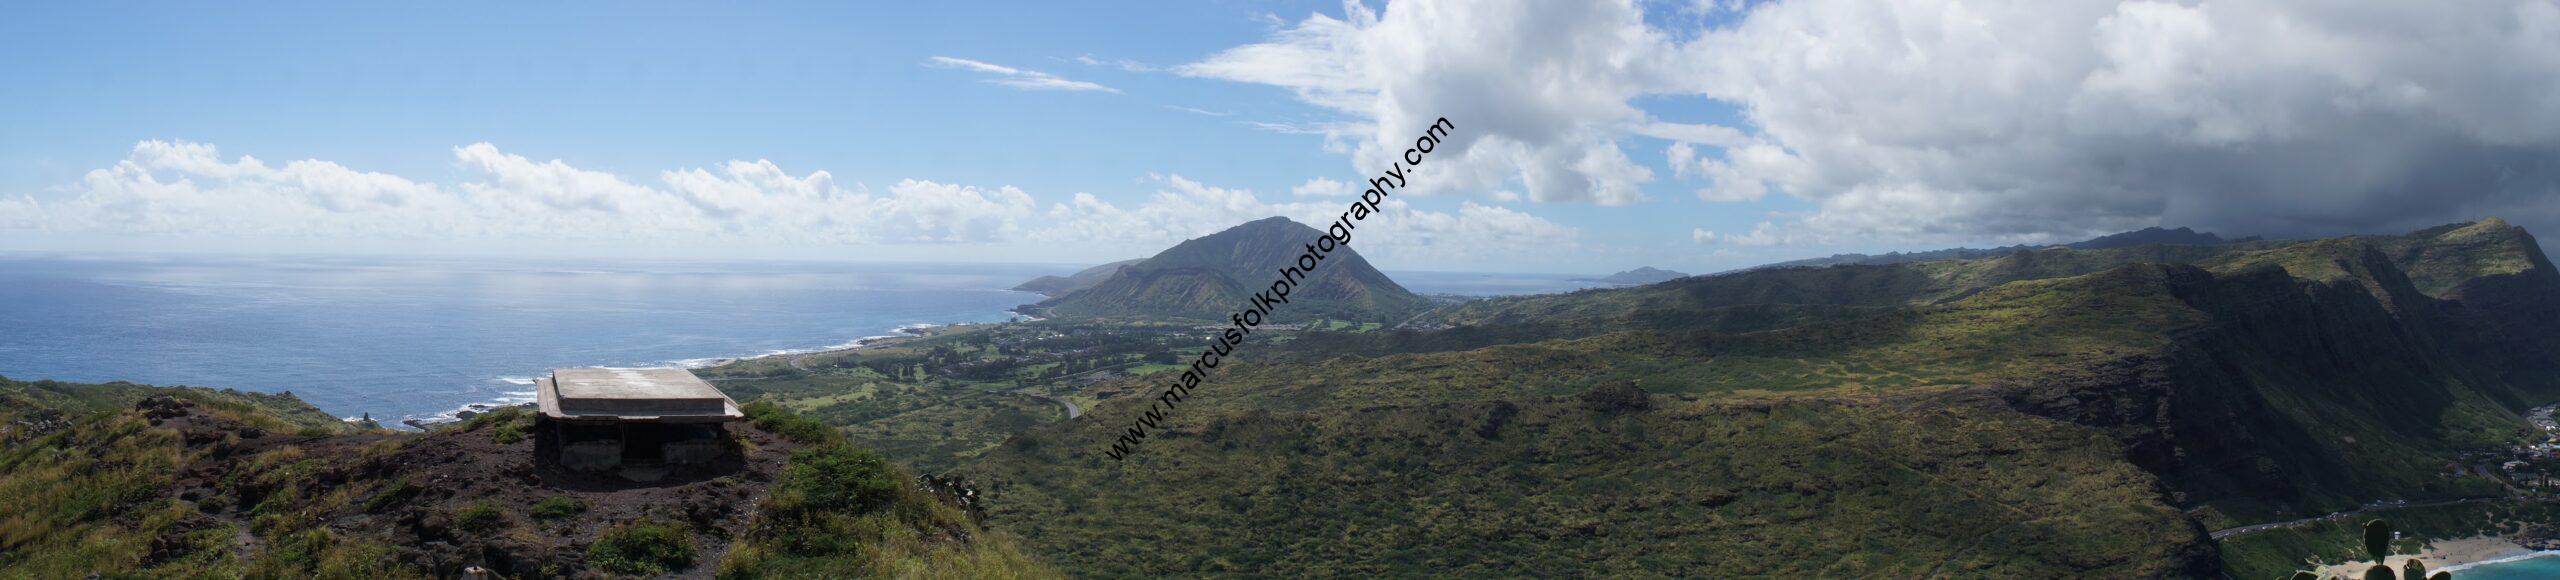
The Hunter and the Frame: A Guide to the World’s Best Photography Locations
In photography, location is more than just a backdrop; it is a collaborator. To capture a photo that drops jaws, you must stop looking for only "pretty places" and start looking for light, geometry, and narrative. What story are you wanting to tell. Even if you are just on vacation and an opportunity presents itself, you should always think through why are you taking this picture? You can still enjoy or have fun with photography. You can still analyze and over think your need for a photo. Photography is about sharing the beauty in your life with others, whether you are selling your pictures or not. Whether you are scouting for a school project, a research study, or a vibrant landscape for the fall, your success depends on your ability to read the environment before you ever press the shutter button. Your success to portraying the beauty you see is rooted in the location and scene you are capturing. I have created a list ideas and places to capture those ideas below. If you join as a member, you also get tips I have learned over the years on how to get to these locations. Some places you will find, when searching for the best places to shoot, that it is walk up and setup, however some will require more. You cannot just shoot anywhere! Here is my breakdown of the best "studios" the world has to offer and how to master them. 1. The Architectural Beauty: Chicago, IL & Spain Architecture requires a disciplined eye for lines and symmetry. They offer different styles for you to choose what you like or what story you are trying to tell. Depending on what style, time period, or maybe a specific persons work, researching those factors and traveling will build your eye for those perfect shots. The best thing about structures and architecture, is that it allows for you to take your time and setup the camera, the tripod, and wait for the proper lighting. The problems are avoiding people, traffic, and getting permission in some cases to shoot. A Great Shot: The "L" Train Curves in Chicago. The intersection of Wells and Lake Streets offers a gritty, geometric layers of steel and shadow. Alternative: The City of Arts and Sciences, Valencia, Spain allows for something completely different, Calatrava’s futuristic white structures offer a masterclass in minimalism and light reflection. Gothic castles and buildings are all over Europe. The main theme is that big cities offer many opportunities to find great architecture and many types of architecture are presented based on the cultural region you are in. The Execution: Use a tilt-shift lens if possible to keep your vertical lines straight. Many cameras come with leveling guides in the viewfinder that work with any lens as well. If not, shoot wider than you think you need to; you’ll want the extra room to correct perspective in post-processing without cutting off the top of a spire. You can include foreground objects to show depth but remember that the point of the picture is the architecture. Try to avoid covering up your main object. A great idea is to include foreground or background items that accentuate the shapes you are capturing. 2. The Landscape Narrative: The U.S. Northeast & Iceland offer landscapes that are about the passage of time. Hawaii offers tropical beauty and overviews of the Earth. Remember that you are looking for something that reflects your story. Do you want warm sunrises, inviting beaches, or cold tundras. Do you want to provide an example of your trip, or dazzle the audience with a natural wonder. These are my favorite photos, so don't worry about taking as many photos as you need. A Great Shot: The Kancamagus Highway, New Hampshire. During peak fall foliage, the Rocky Gorge offers a perfect contrast between the cold, rushing water and the warm skittle-colored canopy. Alternative: The South Coast of Iceland. The black sand beaches at Reynisfjara provide a stark, moody palette that feels almost otherworldly. The Execution: For fall colors, use a circular polarizer (CPL). It’s the single most important tool in your bag for this trip. It cuts the glare off wet leaves and deepens the blues and oranges, giving your prints that "pop" that looks like fine art rather than a snapshot. Most camera lens will have lens filter sets that fit the size of your lens. Just make sure you have those filters for the right size and lenses you prefer to use for landscape shots (Ultra 14mm-24mm or Wide lens 24mm-35mm). Wide lenses gives you the ability to capture the entire scene which you can crop down as necessary. 3. The Street & Human Connection: Madrid & NYC Street photography is about the "decisive moment." Remember it is always important to get permission when taking someone's picture, especially for commercial use and if you don't know them. Street shots can capture a story of movement, happening, and grit. If it is cars passing, ensure you blur any identifying marks or license plates. However, don't forget that the lonely road can be a great story. The open road has been a place for some of my favorite weather shots as well. A Great Shot: Grand Central Terminal, New York City. Capture the light beams hitting the dust at midday. It’s a classic for a reason. It’s a study in human motion within a cathedral of transit. Alternative: Plaza Mayor, Madrid. The interplay of shadows under the porticos at golden hour creates high-contrast silhouettes that are perfect for dramatic black-and-white prints. The Execution: Set your camera to Aperture Priority and use a fast prime lens (35mm or 50mm). You don't want to be fiddling with settings when a moment happens; you want to be part of the flow of the city. Set your shutter speed to quicker for moving shots that you want to come out clear or set it longer for those cool car light streaks. Remember that shutter speed and aperture will effect lighting and illustrate different moods. 4. Actual Studios: There are a great amount of studio spaces you can find out there to shoot portrait or objects. Websites like FD Studio, Peerspace, or even places like AirBnB can provide you great and interesting backgrounds to shoot in. You don't always need a cycle-rama or infinity wall, and you don't need to spend thousands on building lights, paper rollers, or scene boxes to take interesting photos. A Great Shot: Monochromatic stories to talk about opposites. I once found a modern style home on Peerspace that had art in white and black shapes in the kitchen. The model had a white and black outfit she wanted to shoot but didn't know what background to use. When I looked around and found that location, we rented it immediately and took color and black/white portraits that turned out interesting, fun, and told the black and white story. Alternative: FD studio or other photo studios offer infinity or cycle-rama walls that allow you to shoot models with an empty white background. Sometimes getting an actual studio can help you find those more difficult stories you want to show. The Execution: It is imperative you have a tripod when shooting in a studio. You should use the lighting, or bring your own, to allow for low ISO settings that allow for you to work with your other settings to build a perfect shot. Tripods allow you to lengthen the shutter speed so you do not have to worry about shake blur. You should always factor in cost per time when using a studio or rented location, but remember that in most cases, studios allow you to take your time to setup a shot properly. They allow more control over the environment, so don't be afraid to use everything in the room. There is always more examples of the greatest shots because you are limited to where you can travel, your imagination, and your understanding of camera settings. Don't be afraid to take more pictures. Don't fear to just shoot your scene, to tell your story. Spontaneous shooting can be fun and interesting, but even a little planning and considerations can make a photo a blurred Bigfoot shot versus a beautiful capture of what you saw to show others. Become a member of this site to get tips for setting up the best shots and how to find the best places to shoot.
The Secure Frame: A Photographer’s Guide to Safety
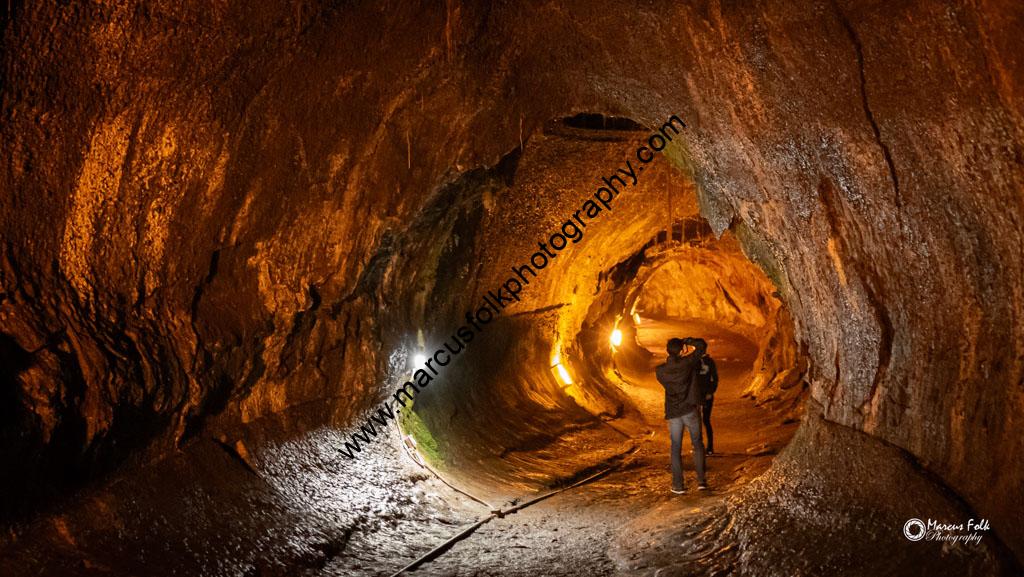
In photography, security is the foundation of execution. A compromised shoot is a failure of planning or paying attention. Whether you are navigating an isolated trail in the Pacific Northwest, handling thousands of dollars of gear in a crowded European plaza, or managing a closed-set portrait session with a model, safety is not an afterthought; it is the prerequisite for giving creativity a chance. A lack of safety and security will degrade that or ruin your creative process completely. It may also end your photography career.
At any individual shoot location, you should get in the habit of researching specific safety tips and checks before heading out. I can never help you with any situation you may encounter but my hope for this blog article is that it gets you thinking or helps in most situations. Remember that when you are looking to capture that perfect photo, that it may require you to go down a difficult trail, but if you are prepared, it should mitigate the risks. Know that safety is never eliminating all hazards or risks but planning how to diminish them or reduce their affect on you. Let's discuss some ways to do that before they become overwhelming.
Public Safety Essentials:
Environmental & Location Awareness:
-
Rule 1: Before traveling, download or print a map of your route completely. If you are walking, note distances and time frames to traverse the terrain you will cross. Don't forget to consider elevation and obstacles. Also remember that your phone might loose signal in remote places so don't always rely on digital mapping functions. This also includes itineraries for flights or other travel information. I always have a printed or written version of my travel code / confirmation number to correct any limited connectivity issues while traveling.
-
Anti-Theft Devices: A photographer looking at a phone while carrying a visible gear bag is a prime target for opportunistic theft. Zippers in the back or unlock bags also give thieves opportunity. Dropping your obvious $10,000 camera and bag is another event waiting to happen. It is good to check everything (inventory) items before moving to the next location. I know many photographers that have lost lens caps because they didn't do that step. Lastly, paying attention to your surroundings, especially who is around you, and having positive control of the more high value items is important. You may want to have a record of serial numbers and identifying marks on your items if you need to file a report.
-
The Rule of Two: In crowded international hubs like Barcelona or Madrid, never use a single-shoulder camera strap or keep a hand on the camera body. Use a cross-body sling with locking carabiner, or keep your camera anchored to your pack. Also, it is best to travel with others (buddy system). One can watch the others things while they go to the bathroom or are away. If something does happen, they buddy can help or notify others. In a trail or hike, it is much easier to receive aid than to render it on yourself.
- Weather: In the military, we would call this a threat analysis. You should know the weather and how to mitigate risks for different types of weather. Sunny days have specific health risks versus a blizzard. Rain will have adverse effects on your equipment which will differ to a windy night. You should always check the weather before you head off to a photo shoot. Clothing, gear, water, and even extra socks can be the difference with a successful shoot versus a catastrophe.
Technical & Shooting Security:
-
The Redundant Backup: Gear can be replaced; data cannot. Backup your card as soon as possible. I usually download photos off my camera daily. Once downloaded, you should backup the raw photos in at least two or more locations. I have lost photos to drive failure so I recommend at least one backup location be setup as a RAID. Having a server that you can access from anywhere can also help you load pictures from photo locations to at least have them at home if something happens. I also recommend you have multiple memory devices and a quick way to access those memory storage devices on a computer to make downloading quick and painless. I have a USB device that handles multiple styles and cards just in case.
-
The Perimeter Check: When setting a tripod on a busy street or a rugged cliff edge, ensure the weighted center column is stable. One sudden gust or a distracted pedestrian can ruin a camera or lens instantly. Check your tripod leg tighteners to ensure once you post the legs don't retract and cause a fall. I once had a event with kids running around. I had to consistently hold my camera to prevent them from kicking or running into my tripod. Pay attention to your surroundings is always a top tip. Watch out for spongy or wet ground as well as your tripod can sink without prior warning. Also, don't set your camera down unless you are sure it will be there when you are ready for it or won't get destroyed while you are doing other things.
- Anchor or Wide-Spread: Some lighting or other camera equipment will come with anchors to prevent falling. Make sure you use them even on stable or flat ground. Extra safety is better than calamity. If they don't have an anchor, tripods should be opened to just over the center width the legs open. To test this, examine the tripod legs barely open and entirely open. Then move to the half way open, and open slightly more. This should give you the best stability with the least amount of space used to move around. Always test stability of the object and tightness of the butterfly nut used to adjust the legs before walking away. Lastly, watch wiring and other objects that when moved could cause the tripod to fall over.
Professional Collaboration (Photographer & Model):
-
The Pre-Production Call: Trust begins before the camera turns on. You should always discuss the creative direction, wardrobe requirements, and comfort boundaries explicitly with the model attending your shoot. I do run into some models that don't know or get offended with honest conversation but let that help you screen out risks. I say the same thing to models. You should know the basics of your shoot before you arrive. That is not to say there won't be creative ideas during shooting, but when everyone has understood boundaries, the creative ideas have a better chance of yielding fun over terror. Communication is a great safety tip.
-
The Comfort Principle: The photographer should never touch a model to adjust hair or clothing without explicit verbal permission. Always communicate what you want to adjust first: "May I adjust the collar of your jacket?" You will eventually work with models that you know and I still ask if I can adjust something. Most models want you to direct, and you can do that with words. For comfort, I would also have water, beverages, and maybe snacks to enjoy while shooting. Some shoots can go for hours. Having a heater or cooling fan available if temperatures go to either extreme can also provide comfort when needed. I always have a safe bathroom available, or know how to get to it quickly, and a safe changing area. Don't ever expect, or place your model in the position, to change in front of you, even if you know them well.
Top 3 Tips for Models:
-
Bring a Companion: For location shoots or initial sessions with a new photographer, you are always welcome to bring a trusted friend or "handler" to the set. Make sure that person understands the nature of the shoot. Make sure they understand they can watch but they are not their to get involved. Also, make sure they are not rude, unqualified (I actually had a companion arrive that was underage, very awkward), and respectful to the shoot location. You should establish a safe word or verbal queues with your companion so they know when they need to intervene or what to do in a situation.
-
Know the Vibe: Request a clear mood board or visual brief ahead of time so there are zero surprises regarding the style or expectations of the imagery. That doesn't mean you can engage in ideas during the shoot, but if you have provided your boundaries and limits, you give more freedom to work creativity in the shoot. Be honest with the photographer and don't be offended if they ask what your boundaries and limits are for the shoot. Always pick up on the environment and adjust as needed.
-
The Right to Veto: You have full veto power over any pose, wardrobe piece, or location that feels unsafe or physically uncomfortable. A professional photographer values your boundaries and comfort above the shot. I have shot near cliffs that we had to adjust because both of us were uncomfortable. We also had to adjust poses because some wouldn't work. Communication is key here as well since if a model says stop, or says they won't shoot something, it is easy for an honest photographer to pivot or work in those boundaries. If you did #2, you should also know what might lead to a veto or how you can pivot if something does become and issue.
