

The Hunter and the Frame: A Guide to the World’s Best Photography Locations
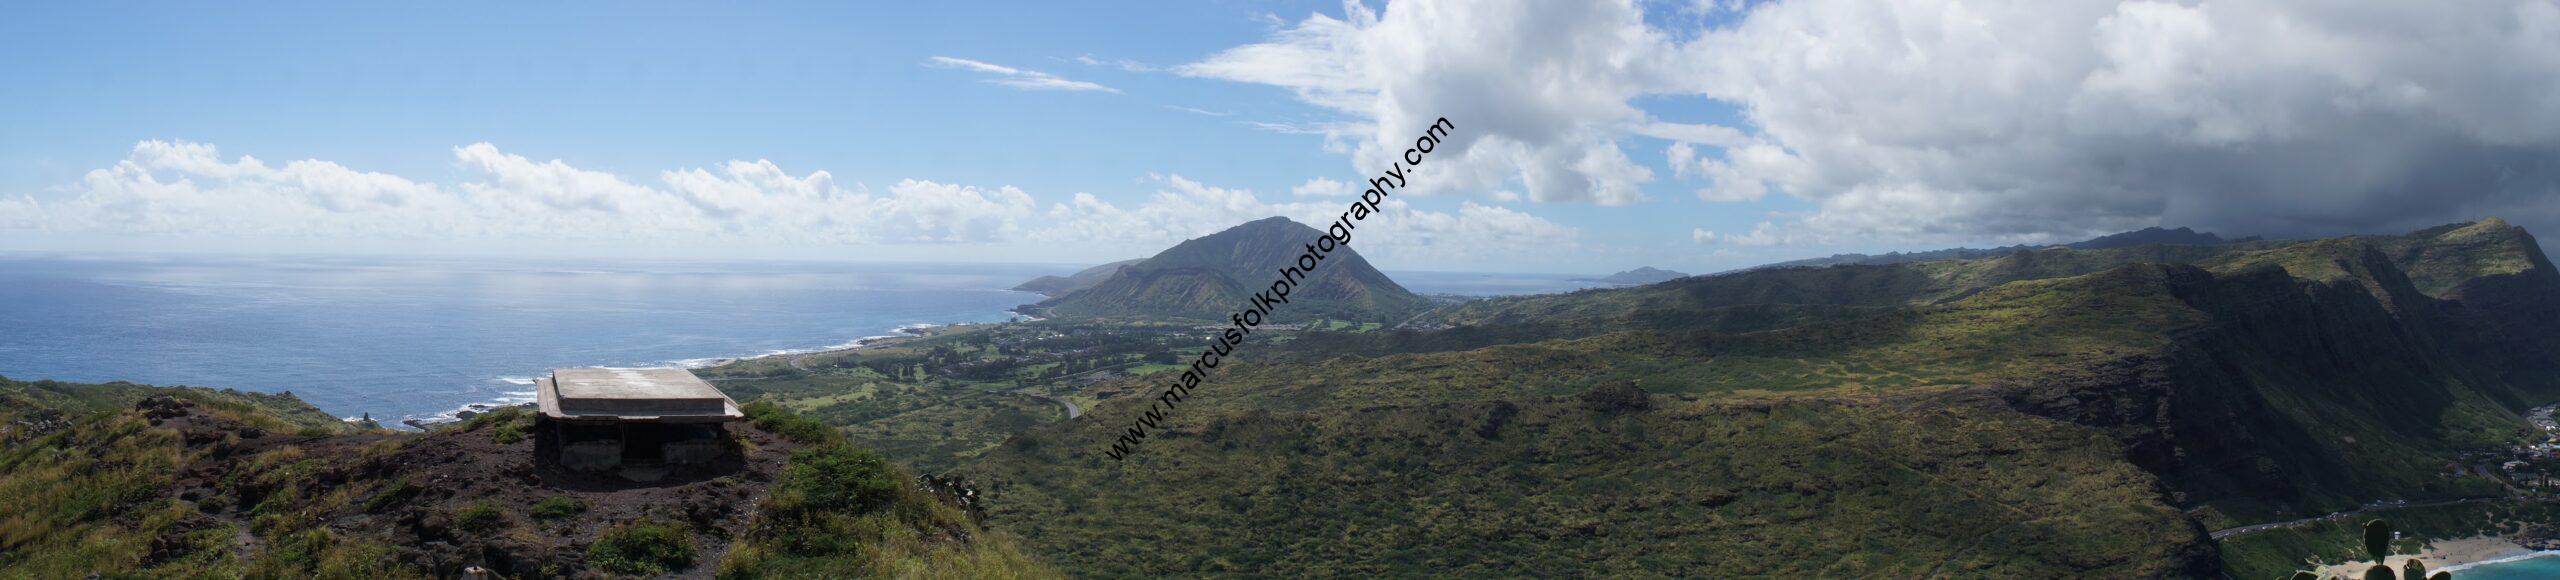
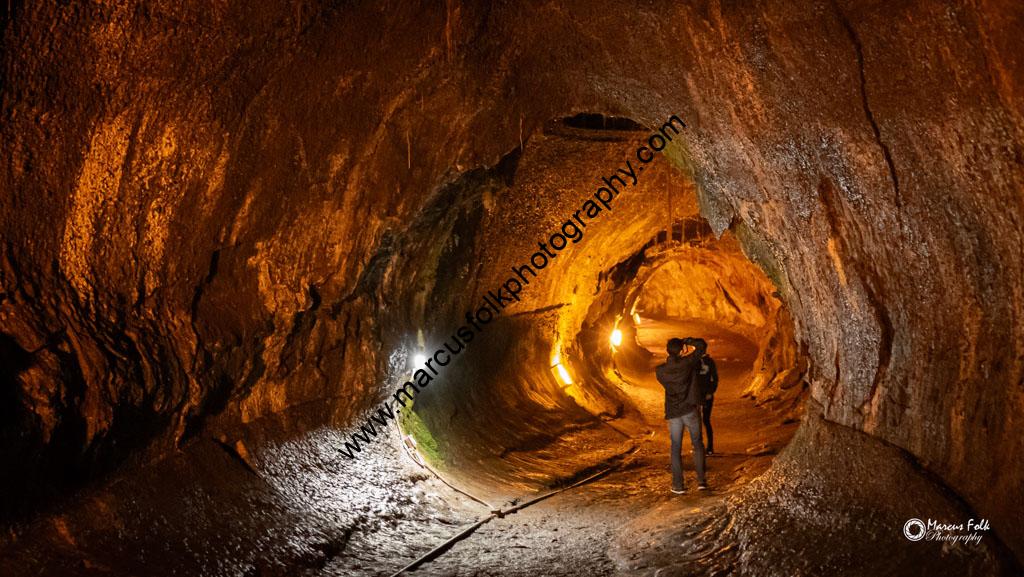
In photography, location is more than just a backdrop; it is a collaborator. To capture a photo that drops jaws, you must stop looking for only "pretty places" and start looking for light, geometry, and narrative. What story are you wanting to tell. Even if you are just on vacation and an opportunity presents itself, you should always think through why are you taking this picture? You can still enjoy or have fun with photography. You can still analyze and over think your need for a photo. Photography is about sharing the beauty in your life with others, whether you are selling your pictures or not. Whether you are scouting for a school project, a research study, or a vibrant landscape for the fall, your success depends on your ability to read the environment before you ever press the shutter button. Your success to portraying the beauty you see is rooted in the location and scene you are capturing. I have created a list ideas and places to capture those ideas below. If you join as a member, you also get tips I have learned over the years on how to get to these locations. Some places you will find, when searching for the best places to shoot, that it is walk up and setup, however some will require more. You cannot just shoot anywhere! Here is my breakdown of the best "studios" the world has to offer and how to master them. 1. The Architectural Beauty: Chicago, IL & Spain Architecture requires a disciplined eye for lines and symmetry. They offer different styles for you to choose what you like or what story you are trying to tell. Depending on what style, time period, or maybe a specific persons work, researching those factors and traveling will build your eye for those perfect shots. The best thing about structures and architecture, is that it allows for you to take your time and setup the camera, the tripod, and wait for the proper lighting. The problems are avoiding people, traffic, and getting permission in some cases to shoot. A Great Shot: The "L" Train Curves in Chicago. The intersection of Wells and Lake Streets offers a gritty, geometric layers of steel and shadow. Alternative: The City of Arts and Sciences, Valencia, Spain allows for something completely different, Calatrava’s futuristic white structures offer a masterclass in minimalism and light reflection. Gothic castles and buildings are all over Europe. The main theme is that big cities offer many opportunities to find great architecture and many types of architecture are presented based on the cultural region you are in. The Execution: Use a tilt-shift lens if possible to keep your vertical lines straight. Many cameras come with leveling guides in the viewfinder that work with any lens as well. If not, shoot wider than you think you need to; you’ll want the extra room to correct perspective in post-processing without cutting off the top of a spire. You can include foreground objects to show depth but remember that the point of the picture is the architecture. Try to avoid covering up your main object. A great idea is to include foreground or background items that accentuate the shapes you are capturing. 2. The Landscape Narrative: The U.S. Northeast & Iceland offer landscapes that are about the passage of time. Hawaii offers tropical beauty and overviews of the Earth. Remember that you are looking for something that reflects your story. Do you want warm sunrises, inviting beaches, or cold tundras. Do you want to provide an example of your trip, or dazzle the audience with a natural wonder. These are my favorite photos, so don't worry about taking as many photos as you need. A Great Shot: The Kancamagus Highway, New Hampshire. During peak fall foliage, the Rocky Gorge offers a perfect contrast between the cold, rushing water and the warm skittle-colored canopy. Alternative: The South Coast of Iceland. The black sand beaches at Reynisfjara provide a stark, moody palette that feels almost otherworldly. The Execution: For fall colors, use a circular polarizer (CPL). It’s the single most important tool in your bag for this trip. It cuts the glare off wet leaves and deepens the blues and oranges, giving your prints that "pop" that looks like fine art rather than a snapshot. Most camera lens will have lens filter sets that fit the size of your lens. Just make sure you have those filters for the right size and lenses you prefer to use for landscape shots (Ultra 14mm-24mm or Wide lens 24mm-35mm). Wide lenses gives you the ability to capture the entire scene which you can crop down as necessary. 3. The Street & Human Connection: Madrid & NYC Street photography is about the "decisive moment." Remember it is always important to get permission when taking someone's picture, especially for commercial use and if you don't know them. Street shots can capture a story of movement, happening, and grit. If it is cars passing, ensure you blur any identifying marks or license plates. However, don't forget that the lonely road can be a great story. The open road has been a place for some of my favorite weather shots as well. A Great Shot: Grand Central Terminal, New York City. Capture the light beams hitting the dust at midday. It’s a classic for a reason. It’s a study in human motion within a cathedral of transit. Alternative: Plaza Mayor, Madrid. The interplay of shadows under the porticos at golden hour creates high-contrast silhouettes that are perfect for dramatic black-and-white prints. The Execution: Set your camera to Aperture Priority and use a fast prime lens (35mm or 50mm). You don't want to be fiddling with settings when a moment happens; you want to be part of the flow of the city. Set your shutter speed to quicker for moving shots that you want to come out clear or set it longer for those cool car light streaks. Remember that shutter speed and aperture will effect lighting and illustrate different moods. 4. Actual Studios: There are a great amount of studio spaces you can find out there to shoot portrait or objects. Websites like FD Studio, Peerspace, or even places like AirBnB can provide you great and interesting backgrounds to shoot in. You don't always need a cycle-rama or infinity wall, and you don't need to spend thousands on building lights, paper rollers, or scene boxes to take interesting photos. A Great Shot: Monochromatic stories to talk about opposites. I once found a modern style home on Peerspace that had art in white and black shapes in the kitchen. The model had a white and black outfit she wanted to shoot but didn't know what background to use. When I looked around and found that location, we rented it immediately and took color and black/white portraits that turned out interesting, fun, and told the black and white story. Alternative: FD studio or other photo studios offer infinity or cycle-rama walls that allow you to shoot models with an empty white background. Sometimes getting an actual studio can help you find those more difficult stories you want to show. The Execution: It is imperative you have a tripod when shooting in a studio. You should use the lighting, or bring your own, to allow for low ISO settings that allow for you to work with your other settings to build a perfect shot. Tripods allow you to lengthen the shutter speed so you do not have to worry about shake blur. You should always factor in cost per time when using a studio or rented location, but remember that in most cases, studios allow you to take your time to setup a shot properly. They allow more control over the environment, so don't be afraid to use everything in the room. There is always more examples of the greatest shots because you are limited to where you can travel, your imagination, and your understanding of camera settings. Don't be afraid to take more pictures. Don't fear to just shoot your scene, to tell your story. Spontaneous shooting can be fun and interesting, but even a little planning and considerations can make a photo a blurred Bigfoot shot versus a beautiful capture of what you saw to show others. Become a member of this site to get tips for setting up the best shots and how to find the best places to shoot.
The Secure Frame: A Photographer’s Guide to Safety
In photography, security is the foundation of execution. A compromised shoot is a failure of planning or paying attention. Whether you are navigating an isolated trail in the Pacific Northwest, handling thousands of dollars of gear in a crowded European plaza, or managing a closed-set portrait session with a model, safety is not an afterthought; it is the prerequisite for giving creativity a chance. A lack of safety and security will degrade that or ruin your creative process completely. It may also end your photography career.
At any individual shoot location, you should get in the habit of researching specific safety tips and checks before heading out. I can never help you with any situation you may encounter but my hope for this blog article is that it gets you thinking or helps in most situations. Remember that when you are looking to capture that perfect photo, that it may require you to go down a difficult trail, but if you are prepared, it should mitigate the risks. Know that safety is never eliminating all hazards or risks but planning how to diminish them or reduce their affect on you. Let's discuss some ways to do that before they become overwhelming.
Public Safety Essentials:
Environmental & Location Awareness:
-
Rule 1: Before traveling, download or print a map of your route completely. If you are walking, note distances and time frames to traverse the terrain you will cross. Don't forget to consider elevation and obstacles. Also remember that your phone might loose signal in remote places so don't always rely on digital mapping functions. This also includes itineraries for flights or other travel information. I always have a printed or written version of my travel code / confirmation number to correct any limited connectivity issues while traveling.
-
Anti-Theft Devices: A photographer looking at a phone while carrying a visible gear bag is a prime target for opportunistic theft. Zippers in the back or unlock bags also give thieves opportunity. Dropping your obvious $10,000 camera and bag is another event waiting to happen. It is good to check everything (inventory) items before moving to the next location. I know many photographers that have lost lens caps because they didn't do that step. Lastly, paying attention to your surroundings, especially who is around you, and having positive control of the more high value items is important. You may want to have a record of serial numbers and identifying marks on your items if you need to file a report.
-
The Rule of Two: In crowded international hubs like Barcelona or Madrid, never use a single-shoulder camera strap or keep a hand on the camera body. Use a cross-body sling with locking carabiner, or keep your camera anchored to your pack. Also, it is best to travel with others (buddy system). One can watch the others things while they go to the bathroom or are away. If something does happen, they buddy can help or notify others. In a trail or hike, it is much easier to receive aid than to render it on yourself.
- Weather: In the military, we would call this a threat analysis. You should know the weather and how to mitigate risks for different types of weather. Sunny days have specific health risks versus a blizzard. Rain will have adverse effects on your equipment which will differ to a windy night. You should always check the weather before you head off to a photo shoot. Clothing, gear, water, and even extra socks can be the difference with a successful shoot versus a catastrophe.
Technical & Shooting Security:
-
The Redundant Backup: Gear can be replaced; data cannot. Backup your card as soon as possible. I usually download photos off my camera daily. Once downloaded, you should backup the raw photos in at least two or more locations. I have lost photos to drive failure so I recommend at least one backup location be setup as a RAID. Having a server that you can access from anywhere can also help you load pictures from photo locations to at least have them at home if something happens. I also recommend you have multiple memory devices and a quick way to access those memory storage devices on a computer to make downloading quick and painless. I have a USB device that handles multiple styles and cards just in case.
-
The Perimeter Check: When setting a tripod on a busy street or a rugged cliff edge, ensure the weighted center column is stable. One sudden gust or a distracted pedestrian can ruin a camera or lens instantly. Check your tripod leg tighteners to ensure once you post the legs don't retract and cause a fall. I once had a event with kids running around. I had to consistently hold my camera to prevent them from kicking or running into my tripod. Pay attention to your surroundings is always a top tip. Watch out for spongy or wet ground as well as your tripod can sink without prior warning. Also, don't set your camera down unless you are sure it will be there when you are ready for it or won't get destroyed while you are doing other things.
- Anchor or Wide-Spread: Some lighting or other camera equipment will come with anchors to prevent falling. Make sure you use them even on stable or flat ground. Extra safety is better than calamity. If they don't have an anchor, tripods should be opened to just over the center width the legs open. To test this, examine the tripod legs barely open and entirely open. Then move to the half way open, and open slightly more. This should give you the best stability with the least amount of space used to move around. Always test stability of the object and tightness of the butterfly nut used to adjust the legs before walking away. Lastly, watch wiring and other objects that when moved could cause the tripod to fall over.
Professional Collaboration (Photographer & Model):
-
The Pre-Production Call: Trust begins before the camera turns on. You should always discuss the creative direction, wardrobe requirements, and comfort boundaries explicitly with the model attending your shoot. I do run into some models that don't know or get offended with honest conversation but let that help you screen out risks. I say the same thing to models. You should know the basics of your shoot before you arrive. That is not to say there won't be creative ideas during shooting, but when everyone has understood boundaries, the creative ideas have a better chance of yielding fun over terror. Communication is a great safety tip.
-
The Comfort Principle: The photographer should never touch a model to adjust hair or clothing without explicit verbal permission. Always communicate what you want to adjust first: "May I adjust the collar of your jacket?" You will eventually work with models that you know and I still ask if I can adjust something. Most models want you to direct, and you can do that with words. For comfort, I would also have water, beverages, and maybe snacks to enjoy while shooting. Some shoots can go for hours. Having a heater or cooling fan available if temperatures go to either extreme can also provide comfort when needed. I always have a safe bathroom available, or know how to get to it quickly, and a safe changing area. Don't ever expect, or place your model in the position, to change in front of you, even if you know them well.
Top 3 Tips for Models:
-
Bring a Companion: For location shoots or initial sessions with a new photographer, you are always welcome to bring a trusted friend or "handler" to the set. Make sure that person understands the nature of the shoot. Make sure they understand they can watch but they are not their to get involved. Also, make sure they are not rude, unqualified (I actually had a companion arrive that was underage, very awkward), and respectful to the shoot location. You should establish a safe word or verbal queues with your companion so they know when they need to intervene or what to do in a situation.
-
Know the Vibe: Request a clear mood board or visual brief ahead of time so there are zero surprises regarding the style or expectations of the imagery. That doesn't mean you can engage in ideas during the shoot, but if you have provided your boundaries and limits, you give more freedom to work creativity in the shoot. Be honest with the photographer and don't be offended if they ask what your boundaries and limits are for the shoot. Always pick up on the environment and adjust as needed.
-
The Right to Veto: You have full veto power over any pose, wardrobe piece, or location that feels unsafe or physically uncomfortable. A professional photographer values your boundaries and comfort above the shot. I have shot near cliffs that we had to adjust because both of us were uncomfortable. We also had to adjust poses because some wouldn't work. Communication is key here as well since if a model says stop, or says they won't shoot something, it is easy for an honest photographer to pivot or work in those boundaries. If you did #2, you should also know what might lead to a veto or how you can pivot if something does become and issue.
")